Under eIDAS Regulation (EU) No 910/2014, a qualified certificate for electronic signature refers to “a certificate for electronic signatures, that is issued by a qualified trust service provider” and meets the requirements specified within the regulation. A QTSP receives qualified status from its member nation’s supervisory body, which authorizes that entity to provide qualified trust services used in creating qualified electronic signatures.
Visit Open Banking Europe for a complete list of QTSPs supplying PSD2-compliant qualified certificates.
If you don't have a QTSP certificate, you can also use either an OBSEAL or OBWAC certificate, for both production and sandbox. An OBSEAL certificate is an eIDAS certificate registered with OBIE. An OBWAC certificate is an eIDAS certificate registered with OBIE for use within the UK and its territories and is equivalent to QWAC in the EU.
Token.io's certificate registration and management process takes the following form:

Guidance on each step of the process is covered in the following topics:
- Requirements for qualified certificates
- Create and download a CSR
- Register the CSR with a QTSP
- Upload a qualified certificate for bank connections
- Register with connected banks
- Manage bank configurations
Heads-up: Certificates are required in production only. Within our sandbox environment, you can continue to use a dashboard-generated API Key.
Annex I of eIDAS requires that QTSP qualified certificates for electronic signatures contain:
An indication that is identifiable through automated processing that the certificate is a qualified certificated for electronic signature
A data set that clearly represents the QTSP that issued the qualified certificate, including such information as the:
- Service provider's Member State where the entity is established
- Name and registration number if the provider is a legal person
- Name of the provider if he or she is a natural person.
Same of the signature or indication is a pseudonym is used
Corresponding electronic signature validation and electronic signature creation data
Digital signatures are a secure and legally binding means of implementing electronic signatures using asymmetric cryptography, a digital signature is secured and authenticated using three algorithms:
- Key-generating algorithm that randomly selects a private key and its corresponding public key
- Signing algorithm that produces the digital signature from the message and private key
- Signature-verifying algorithm that uses the public key, message and digital signature to confirm the authenticity of the message.
Information identifying the certificate's period of validity from start to finish
QTSP's unique certificate identity code
Issuing QTSP's advanced electronic signature and electronic seal
Location where the certificate that supports the advanced electronic signature us available free of charge
An indication, preferable in automated processing form, of where the electronic signature creation data associated with the electronic signature validation data is located in the qualified electronic signature creation device.
If you have a qualified certificate, or an OBSEAL or OBWAC certificate, the Token.io dashboard offers a mechanism for uploading it to complete your signing identification. If you don't have a qualified certificate or you want to use a different qualified certificate, Token.io provides you with the option of generating and downloading a qualified certificate and registering it with a QTSP before uploading it to the Token.io platform.
Generating a CSR and downloading it from Token.io for subsequent registration with a QTSP is the first step in the certification management process.
Although not required when you're working in the Token.io sandbox environment, a valid certificate in compliance with eIDAS is required for production. You may even find registering one or more certificates to be worthwhile during testing in the sandbox. At all events, when you're ready to securely connect with the Token.io platform by registering your qualified certificate, click on Certificate Management under Settings in the navigation panel, then follow these steps:
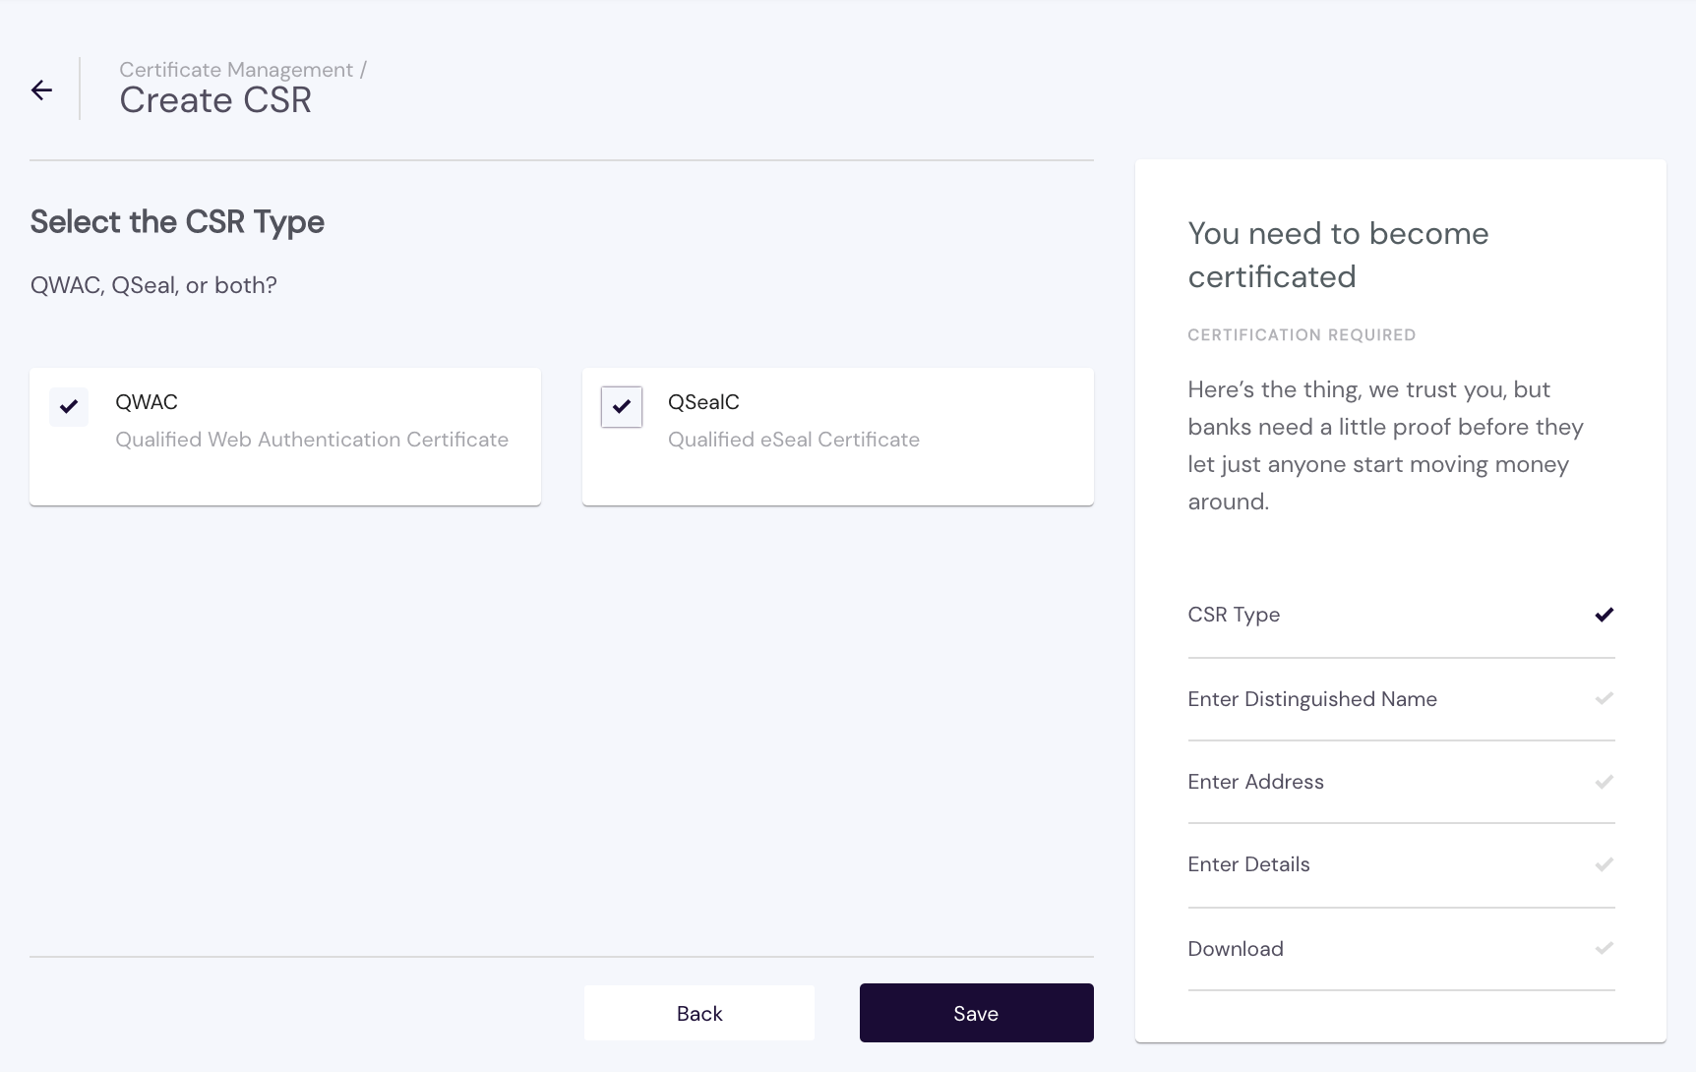
- Click Create CSR and select a CSR type, either QWAC or QSEALC — you are allowed to select both if you will use both — and click Save.
- If you have a Distinguished Name (DN), provide it and click Yes. If you don't have an existing DN, click No. Here's an example of the latter:
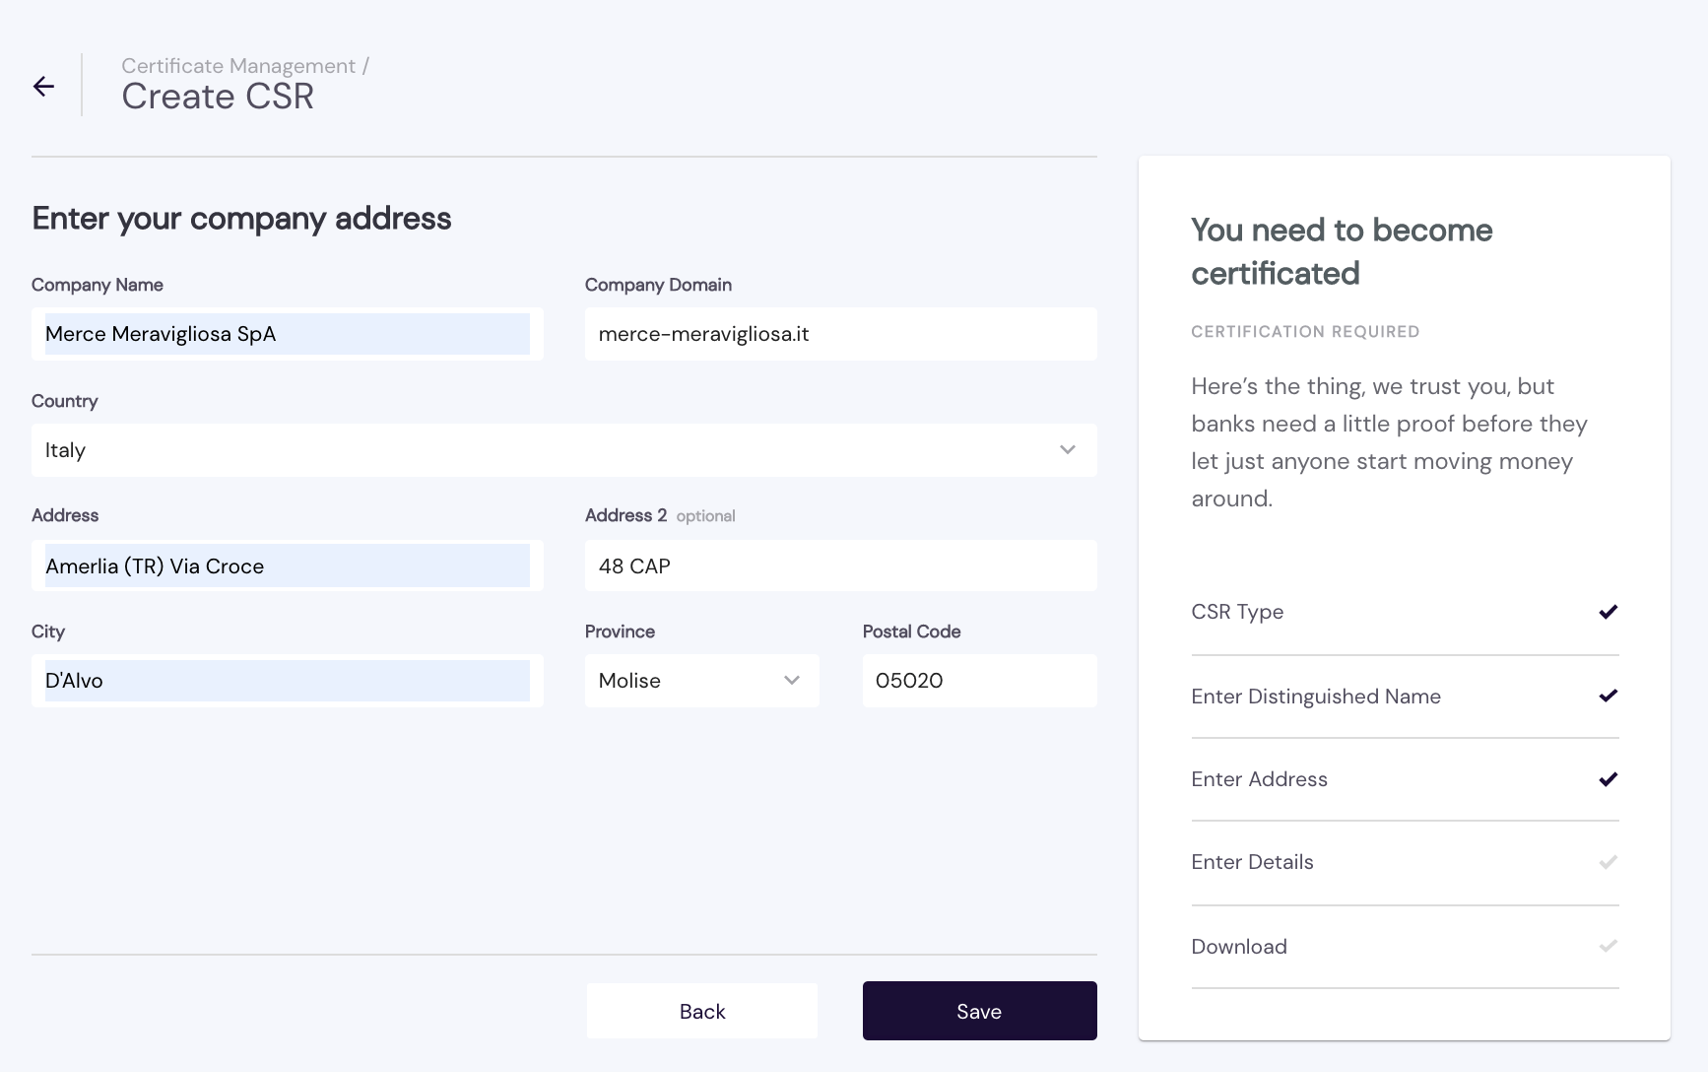
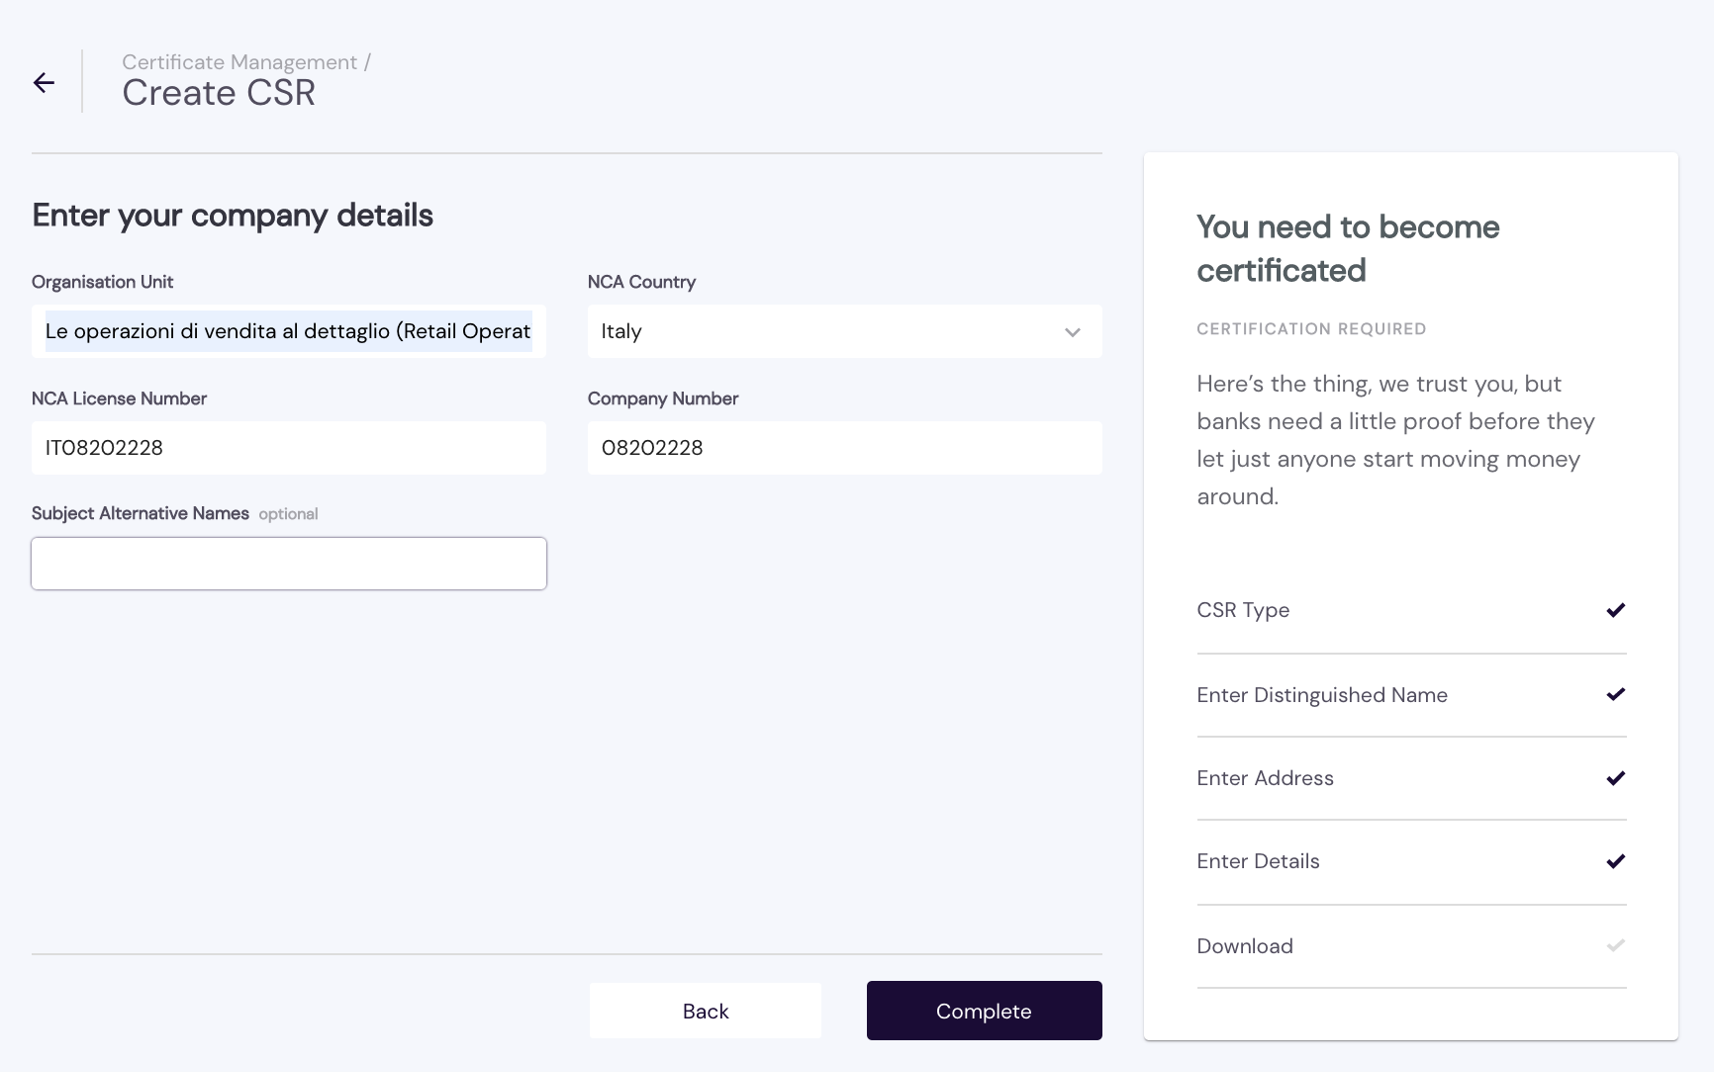
- If you answered No regarding an existing DN, you can now provide your company details and click Complete. Here's an example:
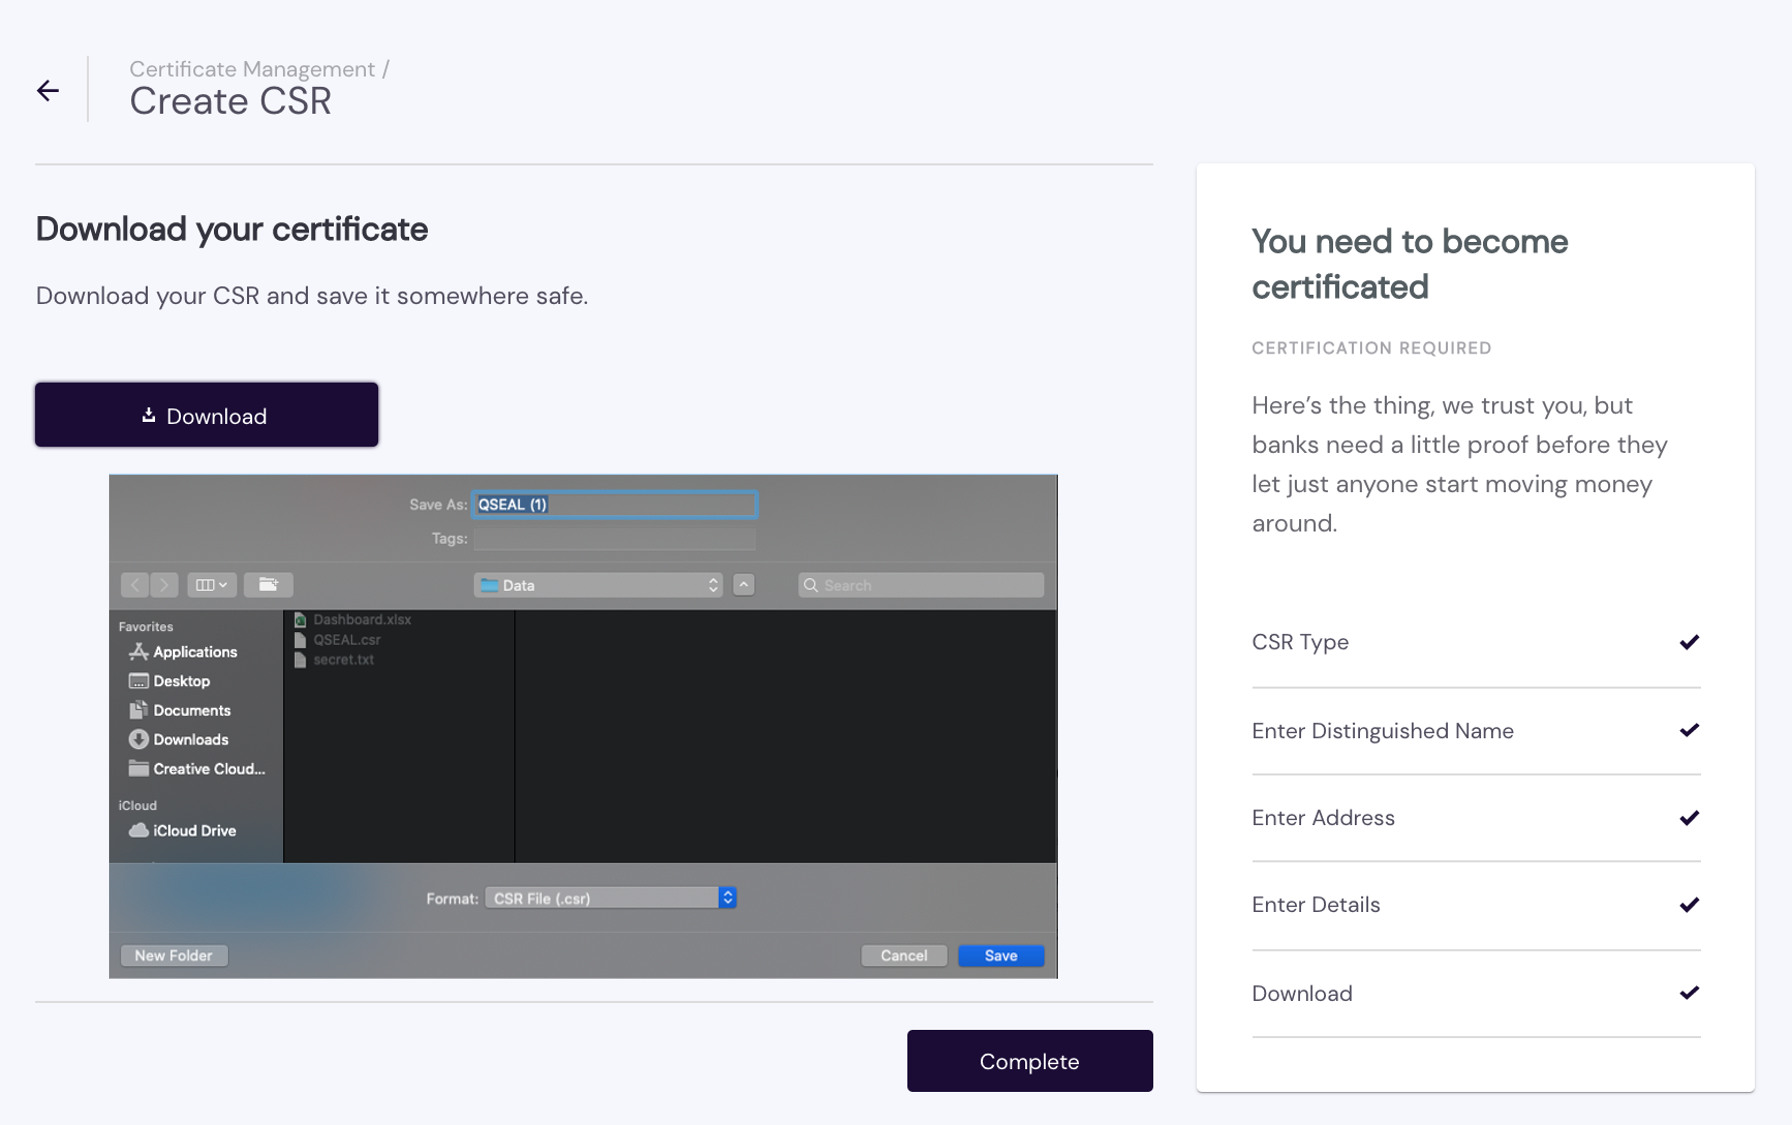
- Click Download to save your CSR in a safe place, then click Complete.
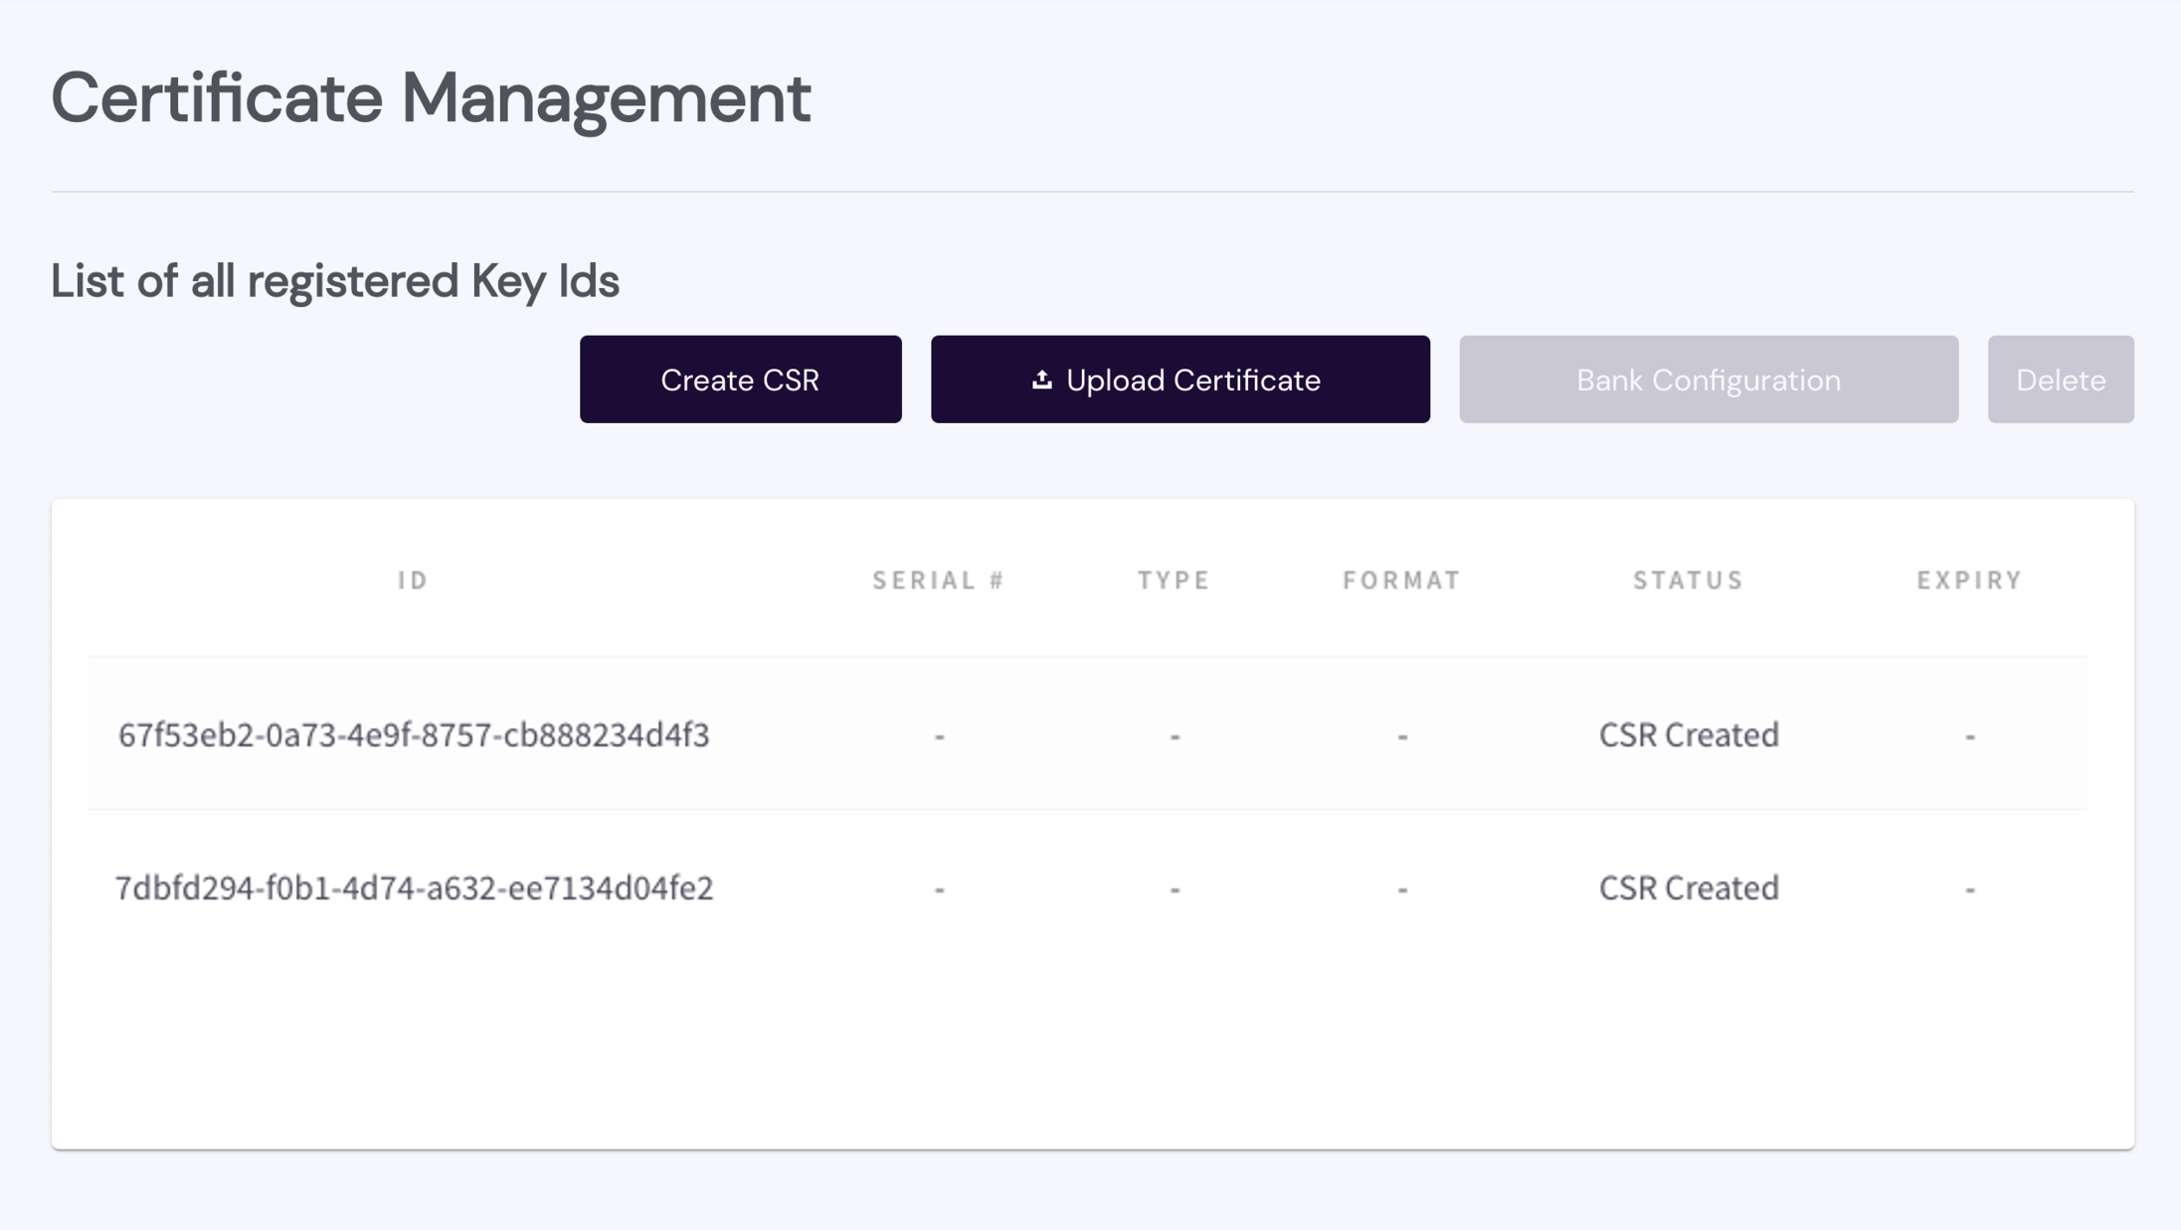
The CSR is now listed in your List of all registered Certificates (example pictured).
QTSPs are regulated (qualified) to provide trusted digital certificates under the electronic Identification and Signature (eIDAS) regulation. PSD2 requires specific types of eIDAS certificates to be issued. Go to https://www.openbankingeurope.eu/qtsps-and-eidas/ for a complete list of QTSPs in the EU trusted list, select one that meets your location and business requirements, and register your CSR in accordance with the procedures provided by the QTSP.
If you are not using Token.io's license, your NCA license for the Open Banking services you will provide is required by the QTSP in order to generate a qualified certificate.
Proceed to the next step only after obtaining your qualified certificate.
There are two types of certificates you'll need to upload if you are providing PIS with refund/reverse payment support — one for bank connections and one for refunds. If you are only providing AIS and/or CAF support , refund certificates are not required.
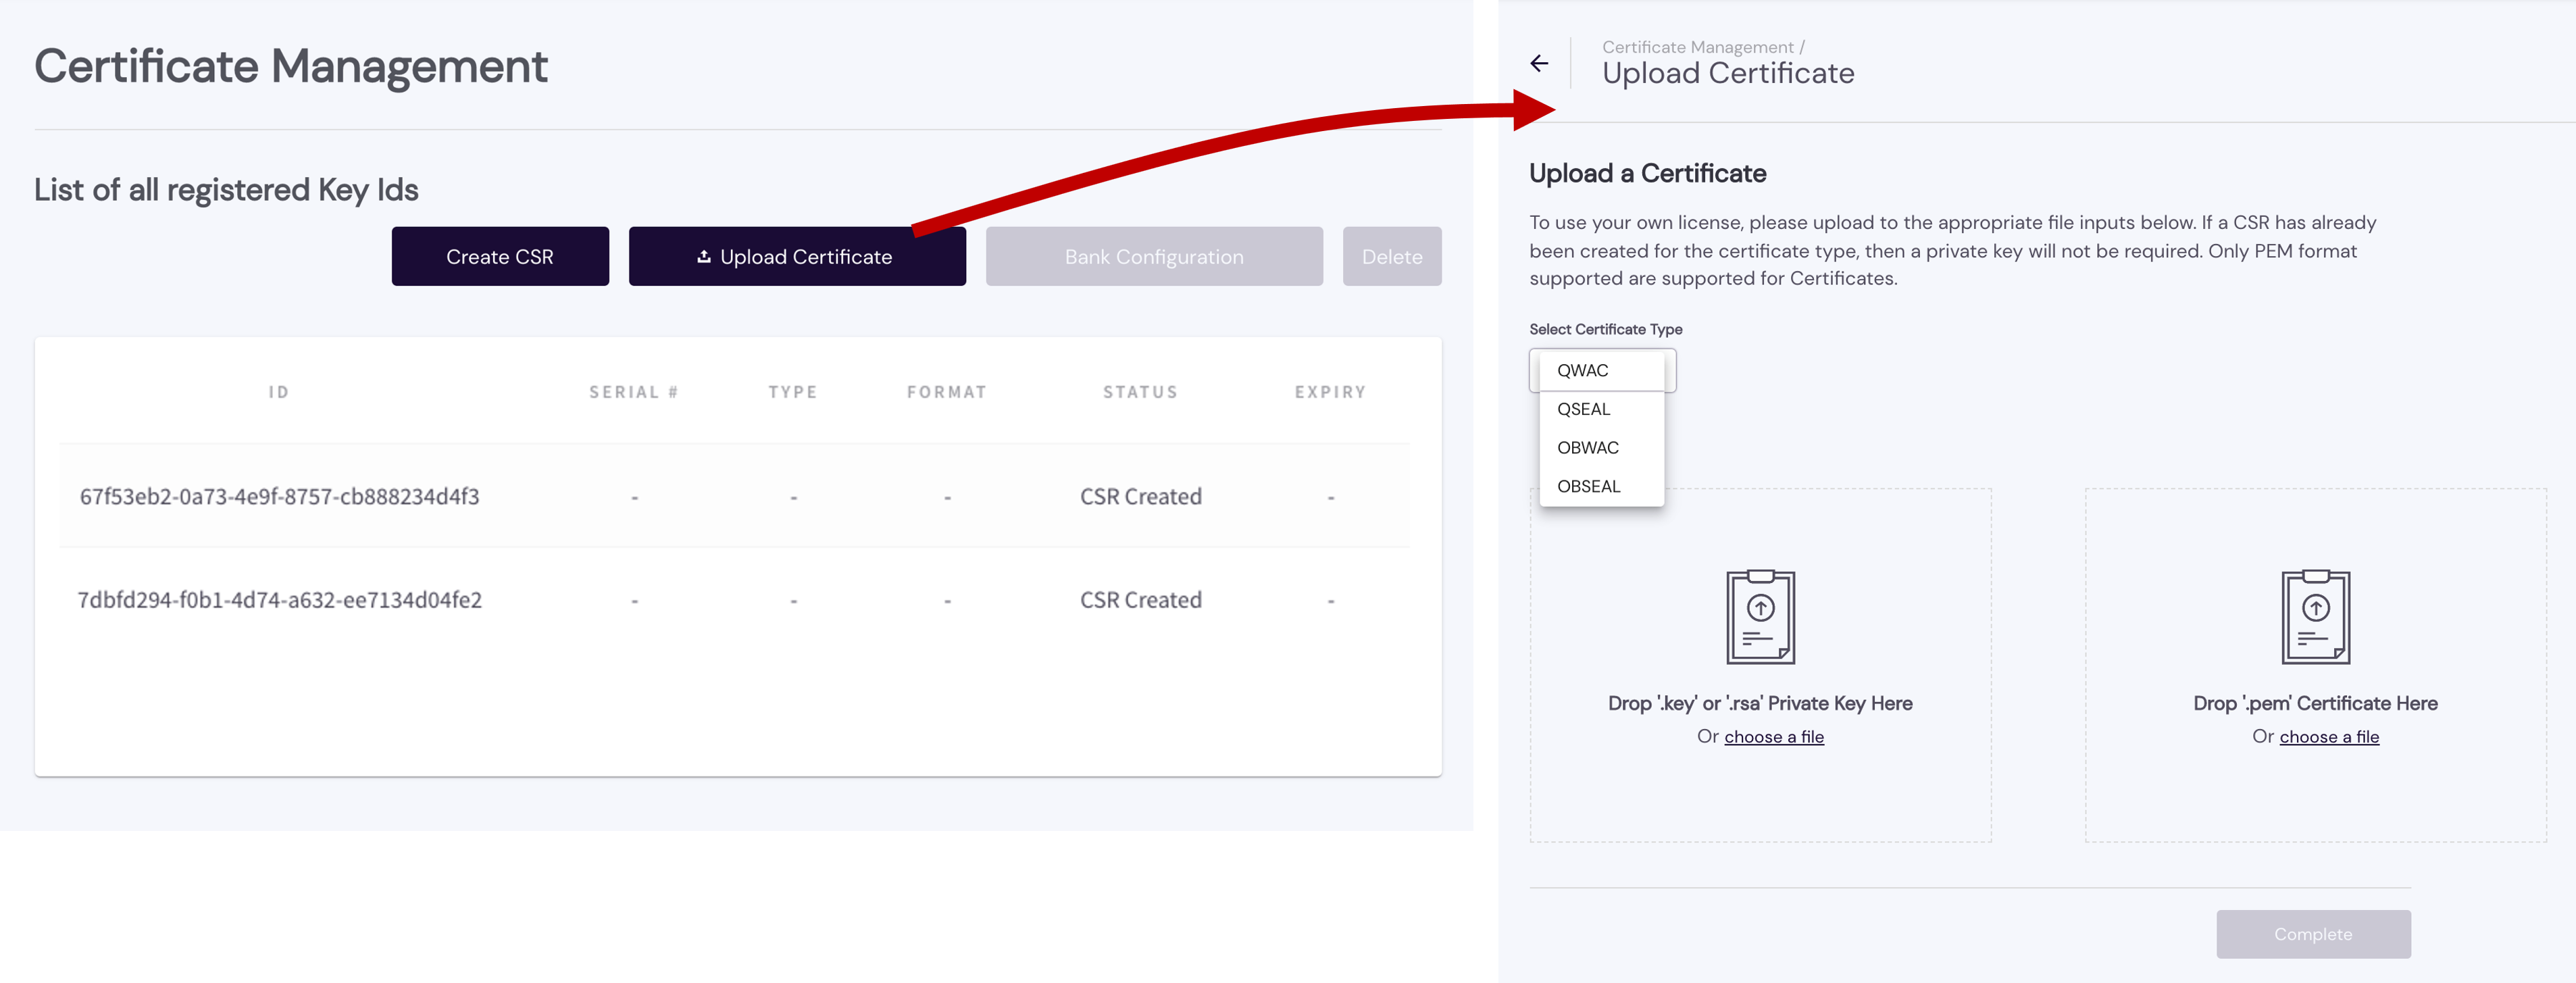
For bank connections, return to Certificate Management > Bank Connections and click Upload Certificate, then:
- Select the type of certificate you are uploading: QWAC, QSEAL, OBWAC, or OBSEAL. If the bank you're connecting with is in the EU, you'll need either a QWAC or QSEAL. If the bank is in the UK or its territories, you'll need an OBWAC or OBSEAL.
- Drag and drop your private key in .key or .rsa format to Drop '.key' or '.rsa' Private Key here or browse for a corresponding file by clicking choose a file.
- Drag and drop your qualified certificate file to the Drop '.pem' Certificate here box or click choose a file to select it from the location you specified when you created the certificate, then click Complete.
If your certificate is a properly formatted (.pem) qualified certificate, you'll see its remaining details — SERIAL #, TYPE, FORMAT, STATUS, and EXPIRY — in your List of all registered Key Ids.
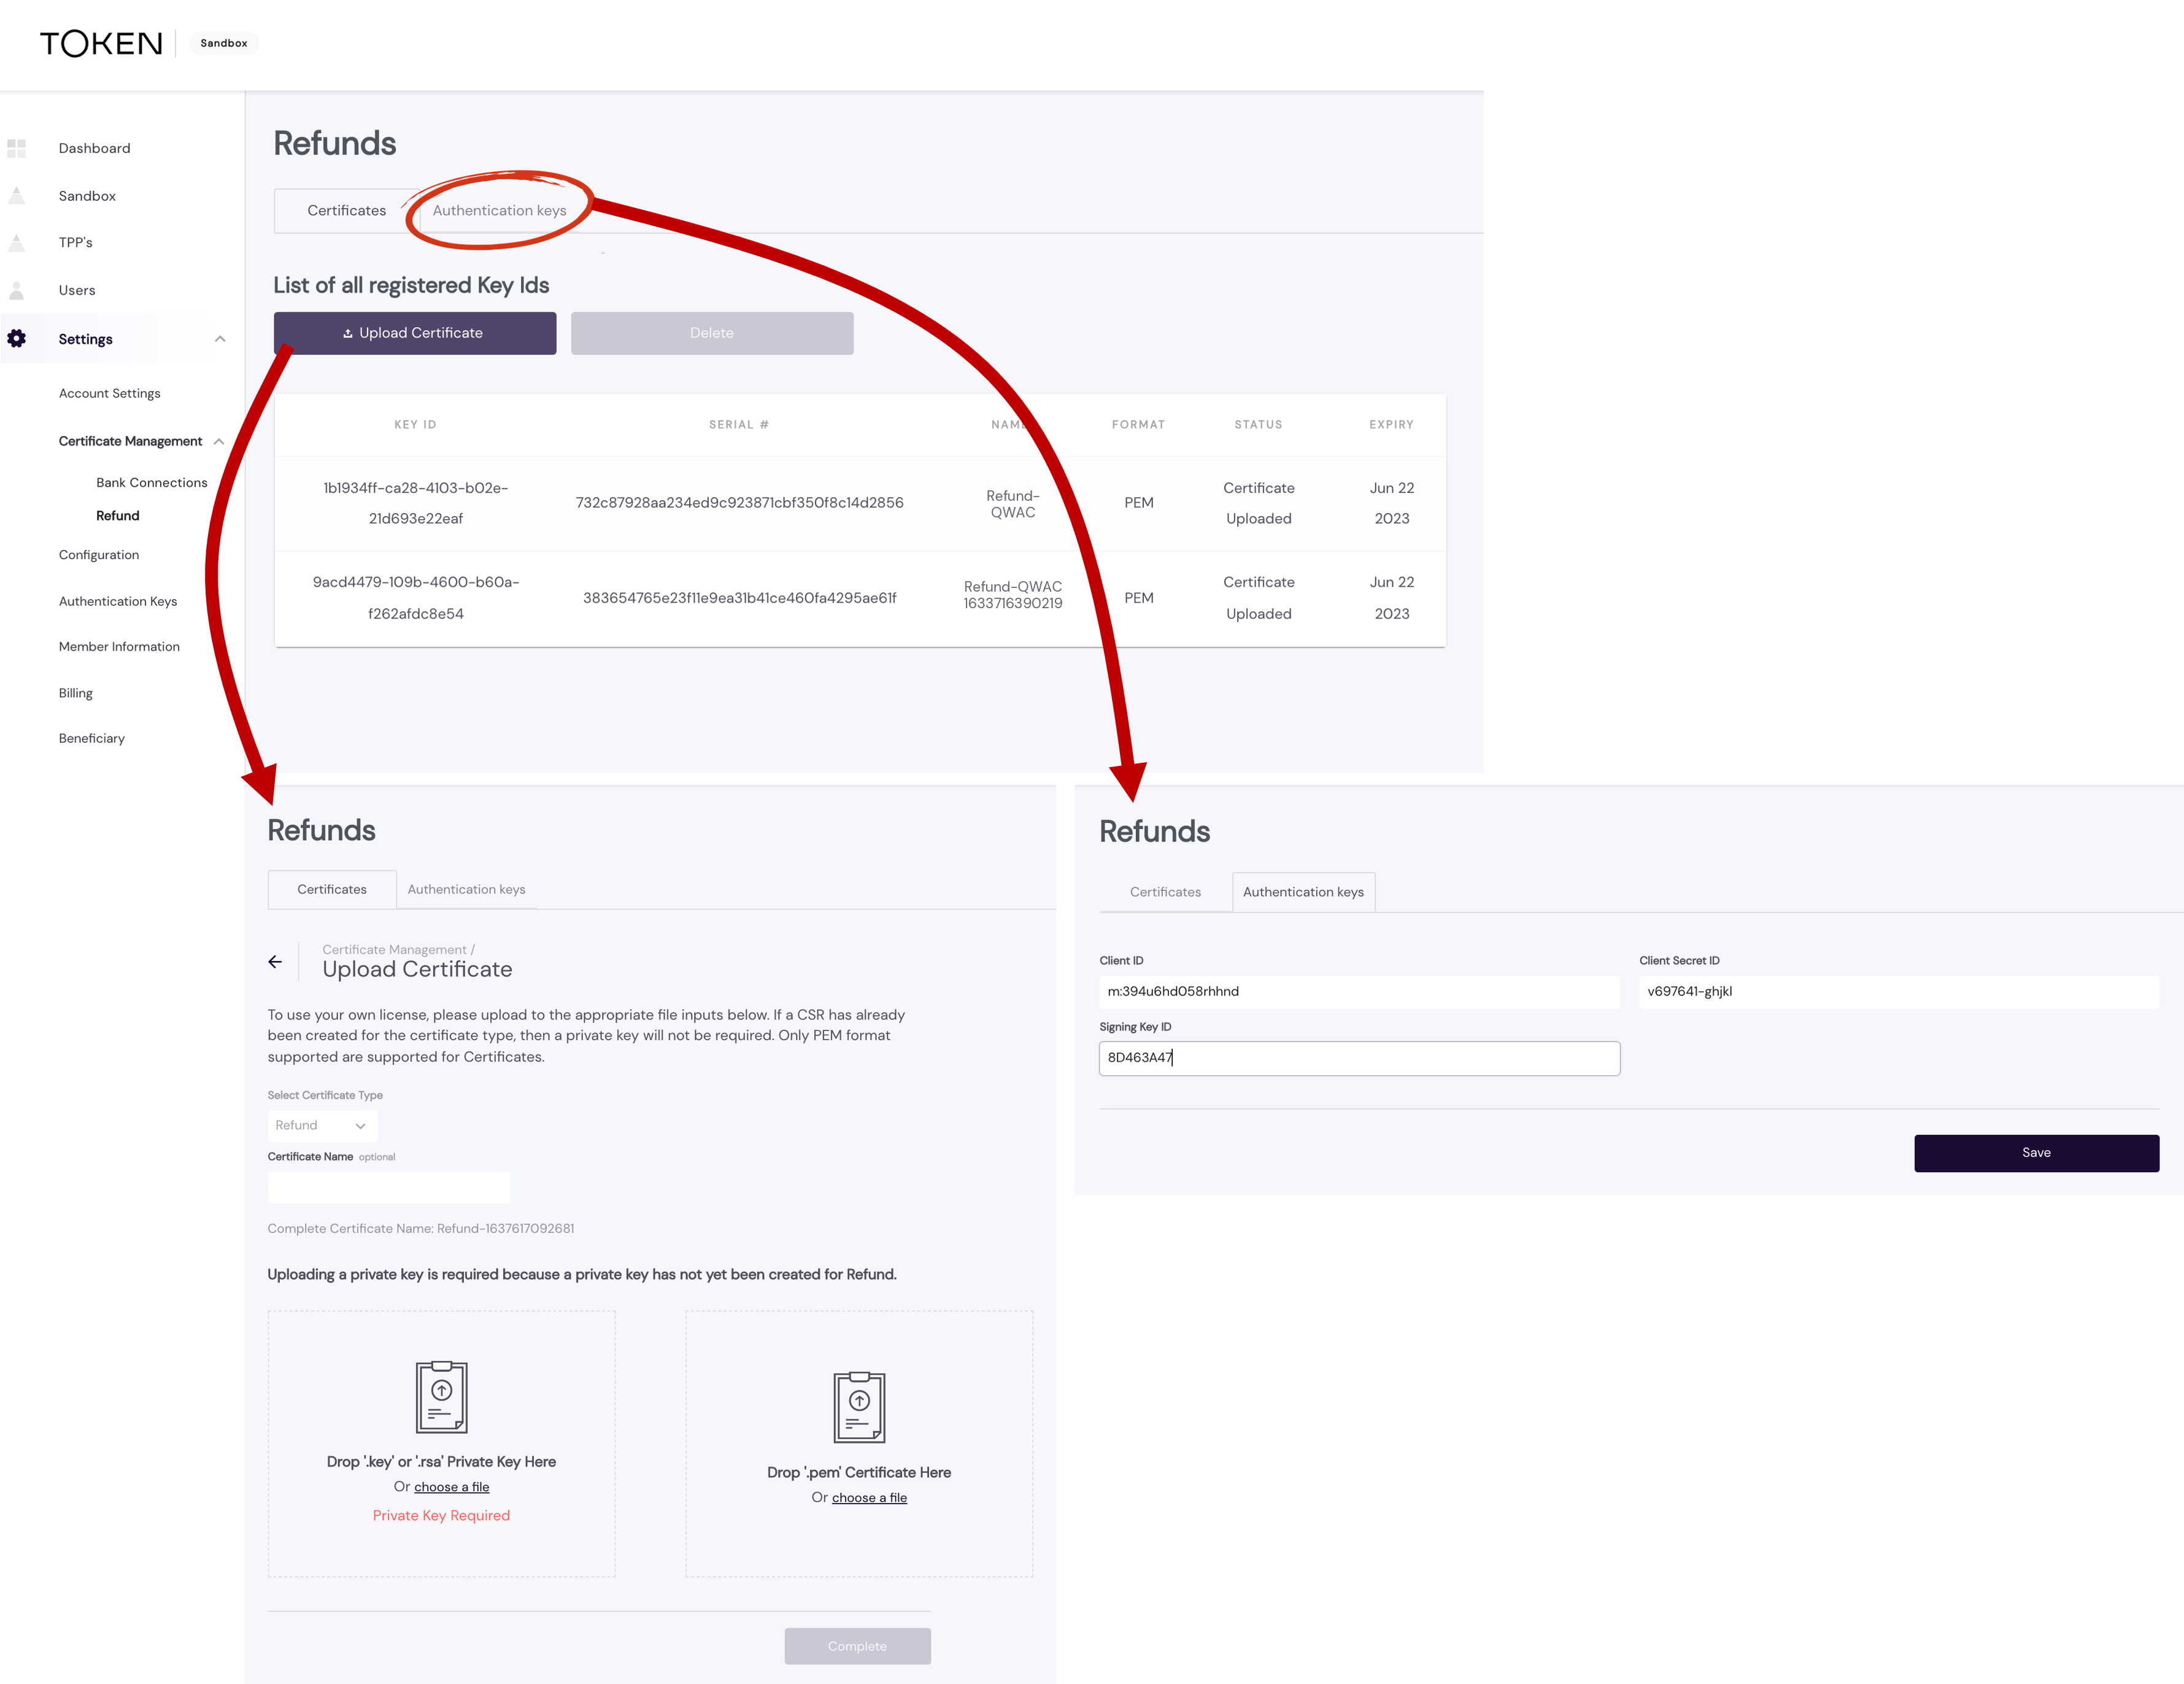
For certificates needed to support refunds, go to Certificate Management > Refund and click Upload Certificate under the Certificates tab. As indicated, if you're using your own license, upload both your private key and a .pem certificate. If a CSR has already been created for the certificate type — QWAC, QSEAL, OBWAC or OBSEAL — a private key is not required.
- Enter an optional Certificate Name prepended with 'Refund-', followed by the certificate number (can be a maximum of 22 characters).
- If no CSR has been created for the certificate type, drag and drop your private key in .key or .rsa format to Drop '.key' or '.rsa' Private Key here or browse for a corresponding file by clicking choose a file.
- Drag and drop your qualified certificate file to the Drop '.pem' Ceritifcate here box or click choose a file to select it from the location you specified when you created the certificate, then click Complete.
- Select the Authentication keys tab to add your server authorization information — Client ID, Client Secret ID, and Signing Key ID – for OAuth 2.0.
As with bank connections, if your refund certificate is a properly formatted (.pem) qualified certificate, you'll see its remaining details — SERIAL #, TYPE, FORMAT, STATUS, and EXPIRY — in your List of all registered Key Ids.
Remember, only .pem format certificates are supported.
Each bank with which you register enforces NCA licensing restrictions for the TPP services requested (PIPS and/or AISP) that can vary from bank to bank and country to country. It's important to follow each bank's instructions carefully and receive confirmation that the registration process was successful before attempting a service connection through Token.io. Successful license registration with a bank/bank group records the client ID embedded within the qualified certificate you upload to Token.io, which identifies your organisation as an appropriately licensed TPP. In certain cases, you may need to provide this value manually.
The typical live sign-up for most banks takes place when you visit the bank's URL for TPP onboarding and documentation. There, you'll fill-out and application and provide your qualified certificate. Along with other bank-specific, steps, you may be required to contact the bank by email to request access to the bank's production environment.
Upon completing registration with a bank, you will receive your Client ID for that bank (typically extracted from your qualified certificate), along with a client SECRET key and other bank-generated identifiers, as applicable.
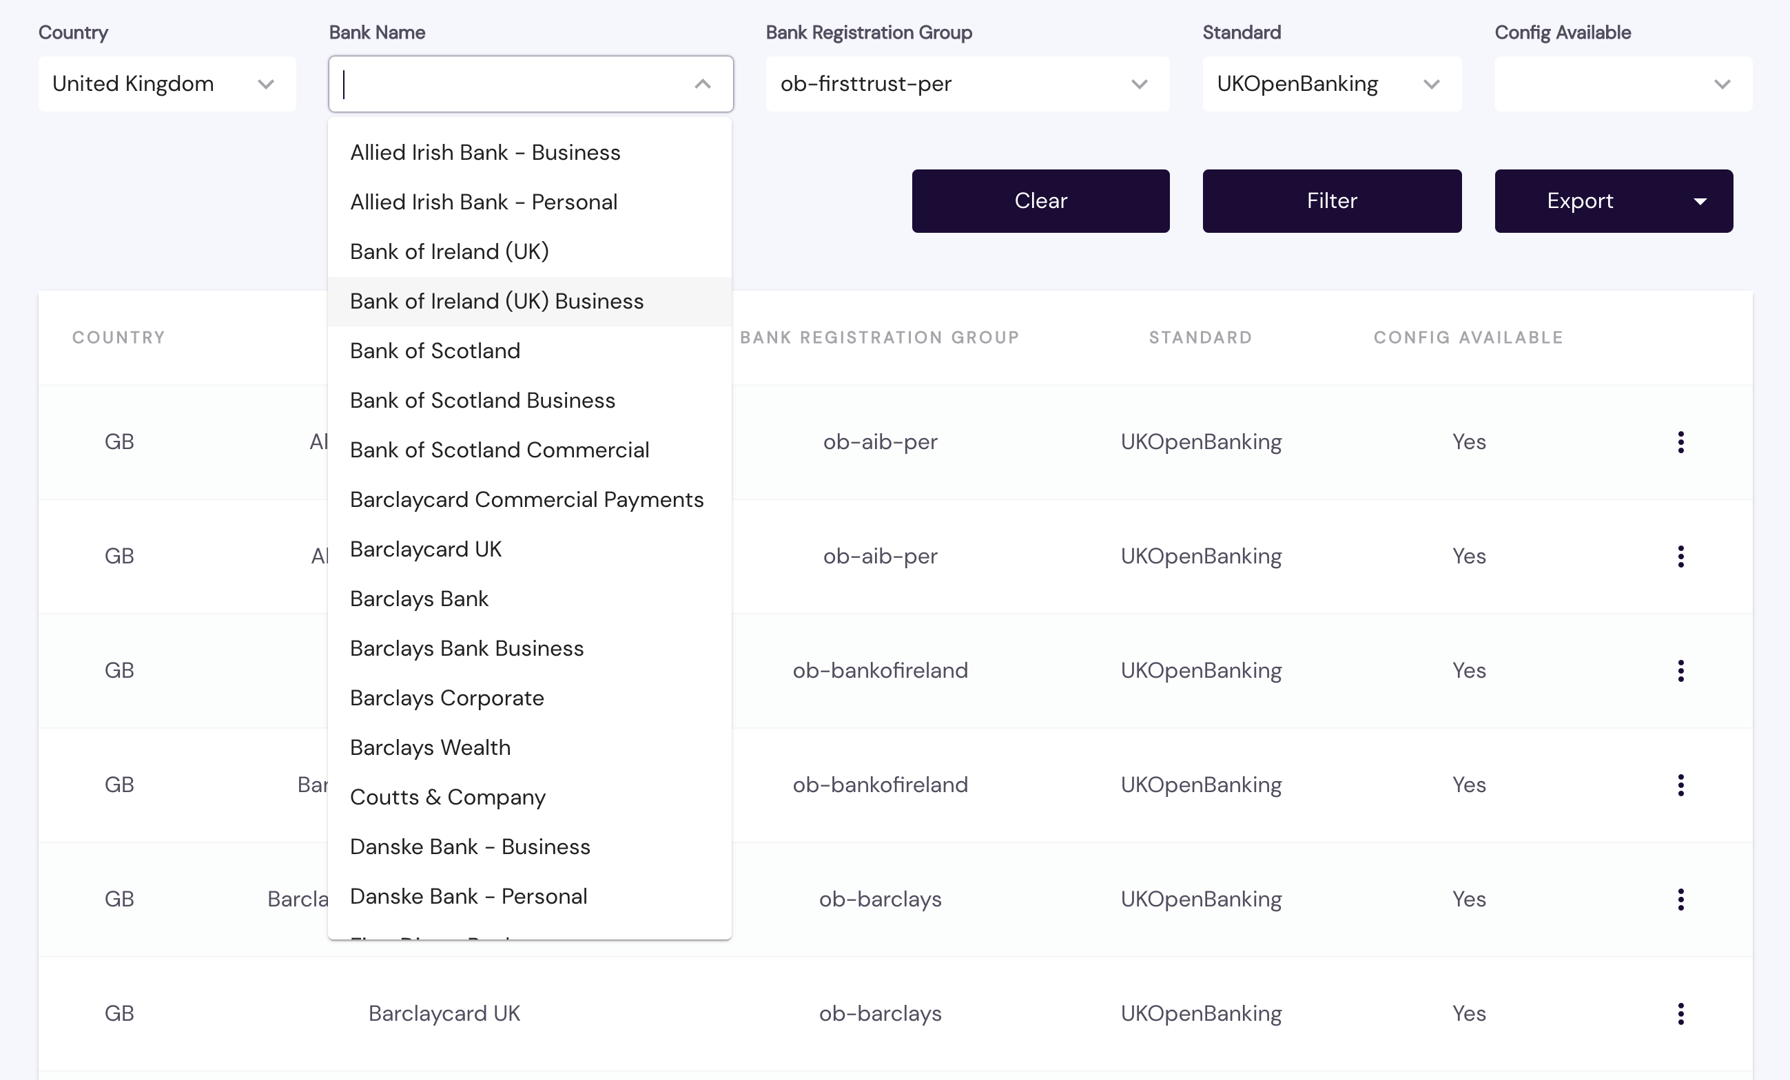
Select the countries and connected banks within those countries you want Token.io to configure for each certificate by clicking Bank Configuration. This displays the following page (click to enlarge):
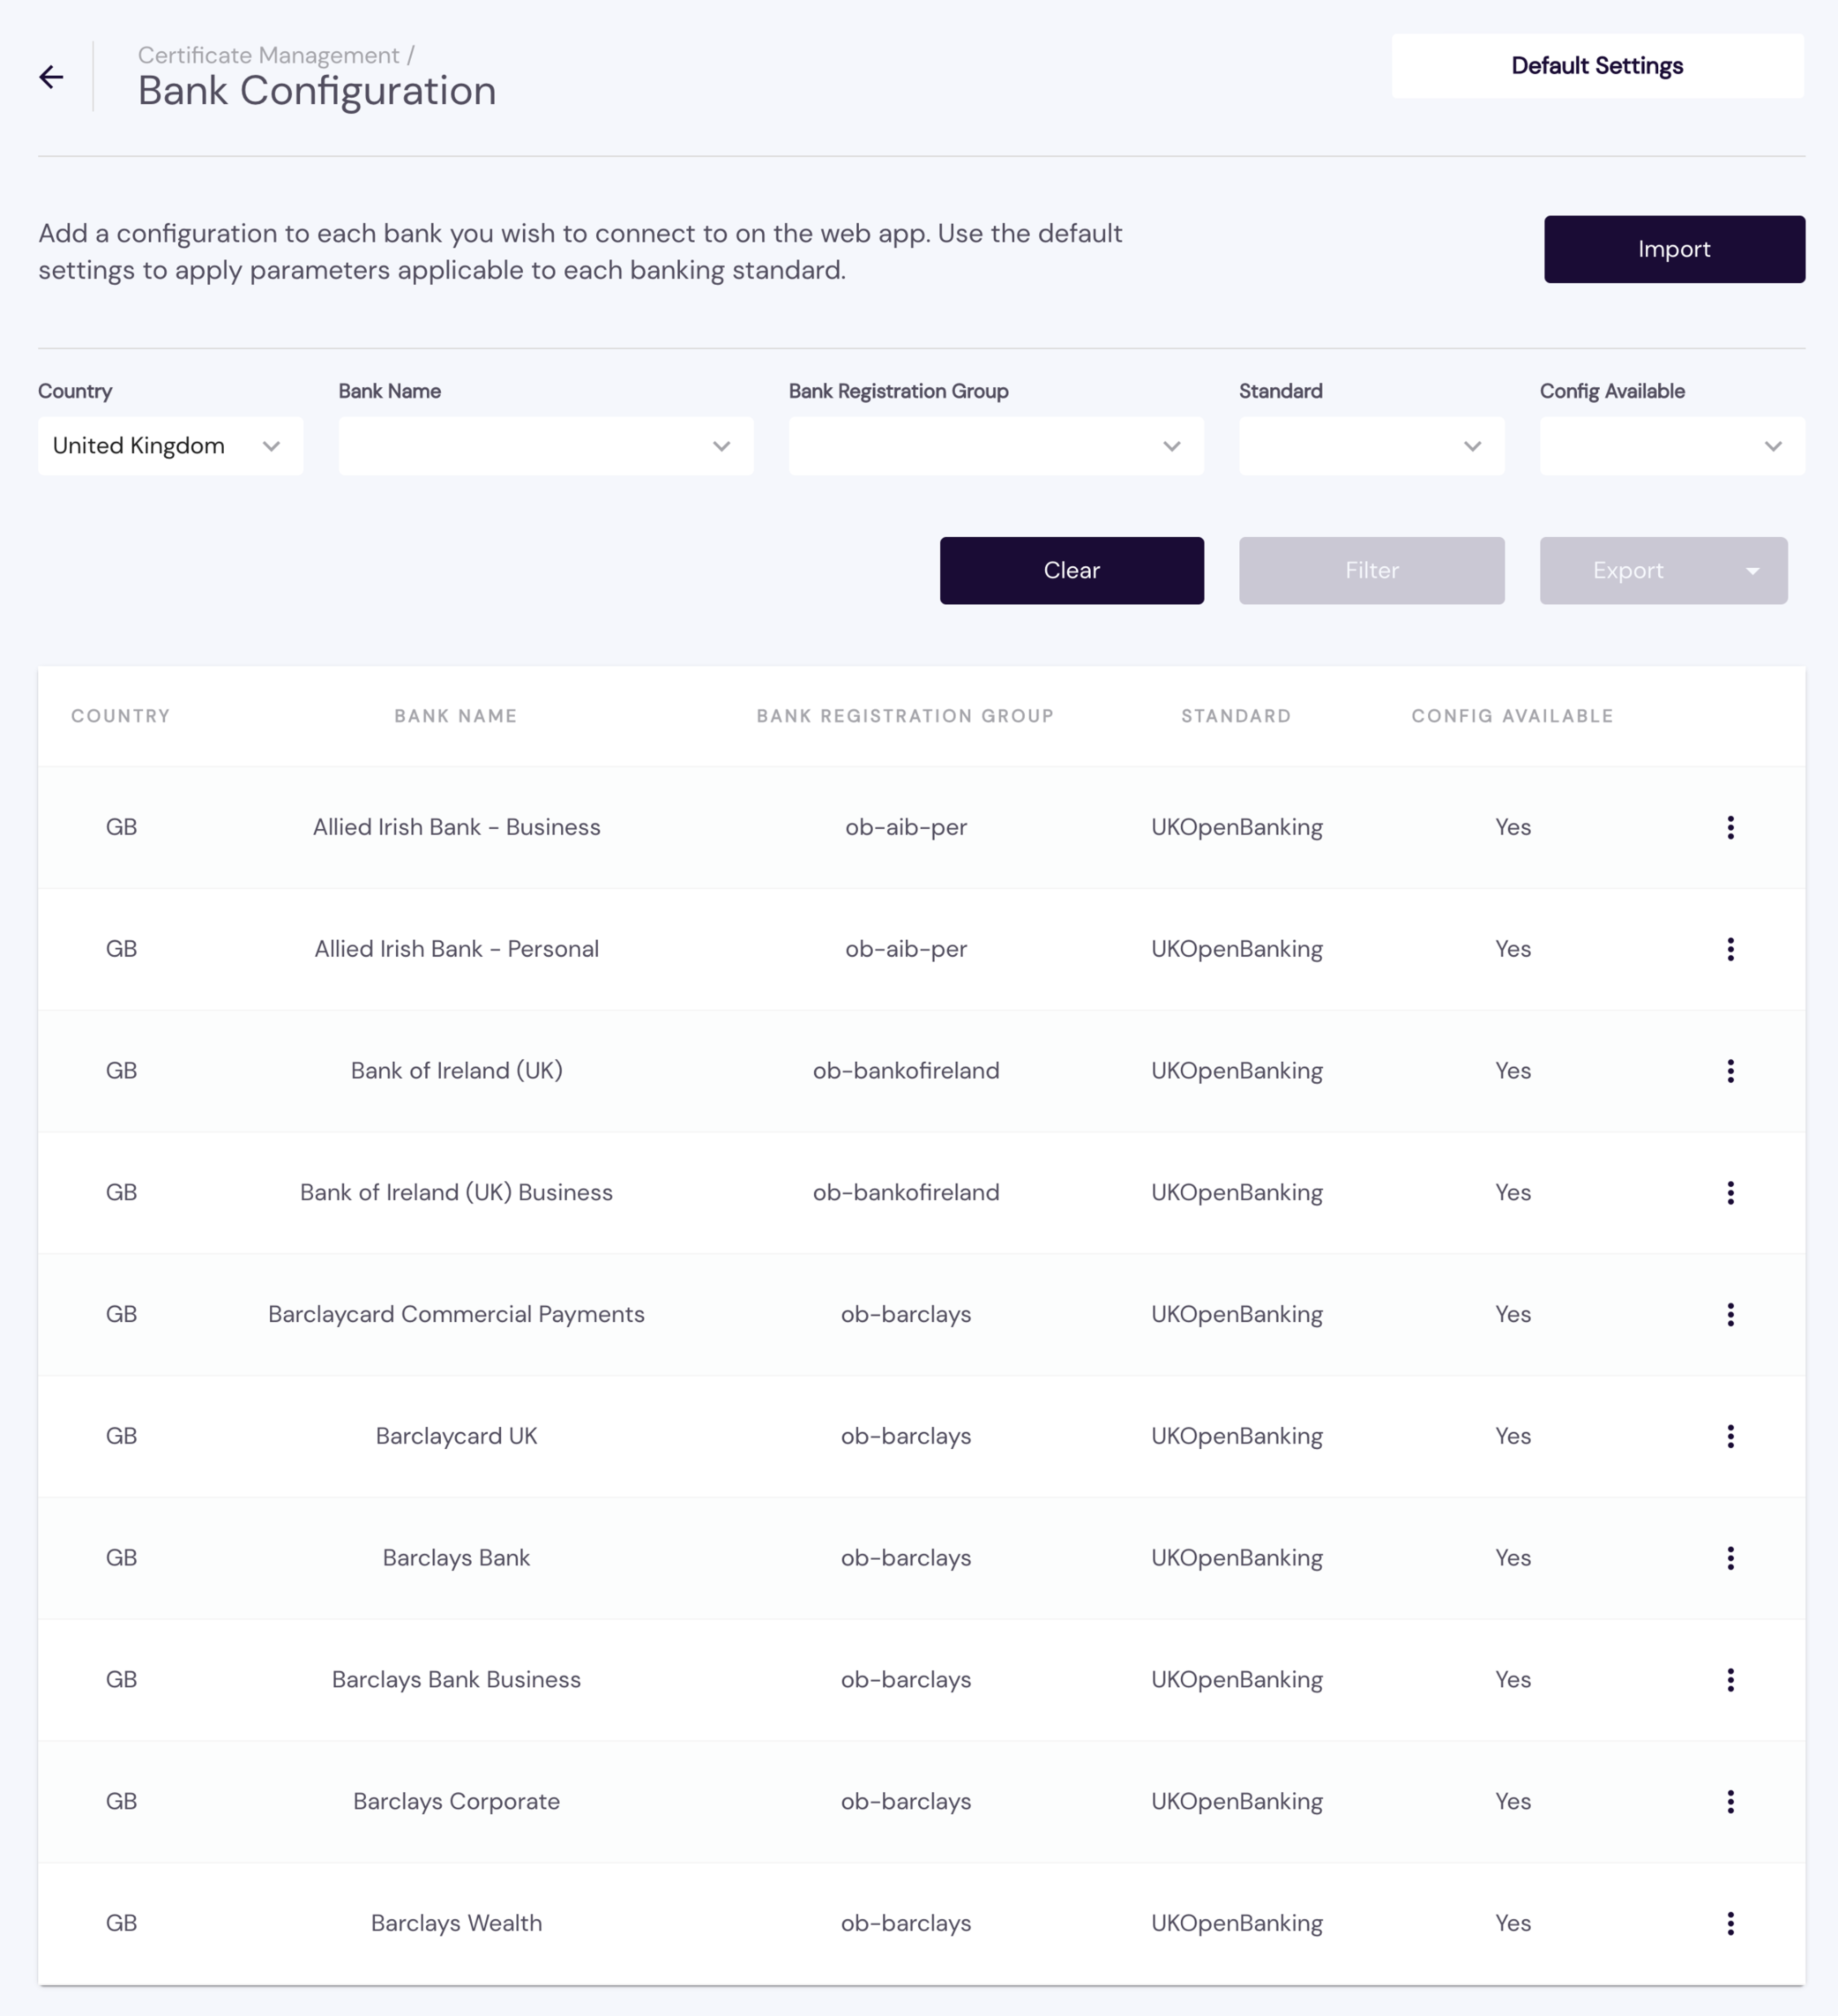
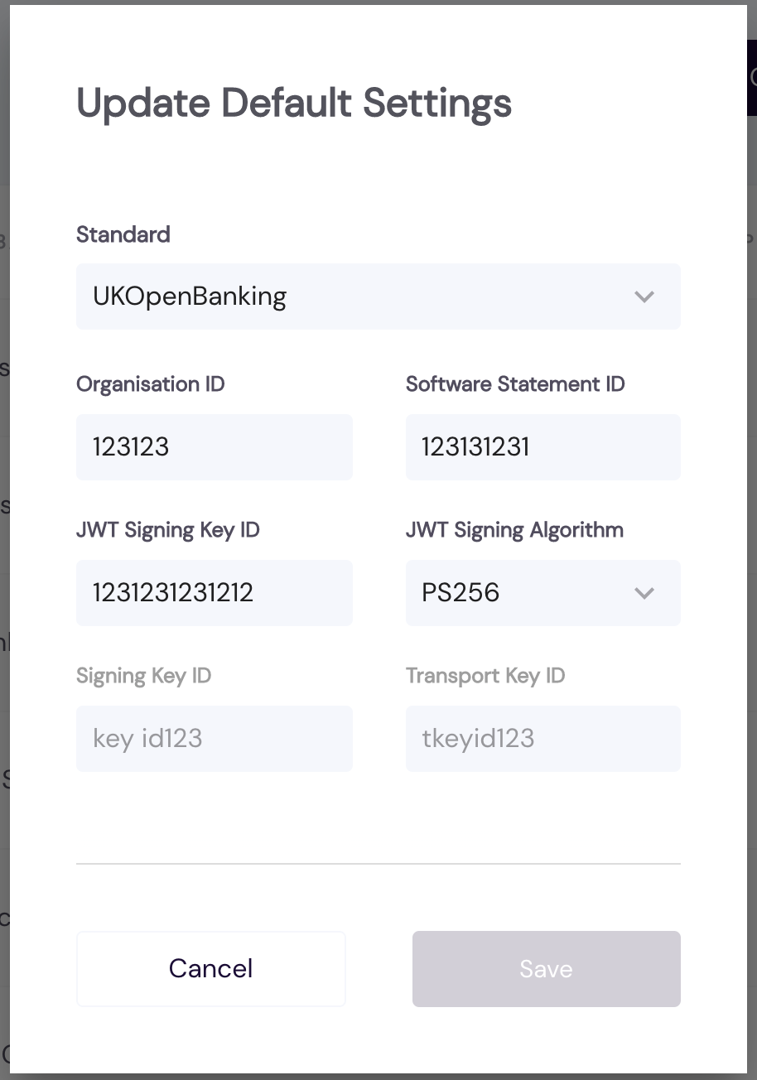
Click DEFAULT SETTINGS, update the relevant information based on the Open Banking standard selected — UKOpenBanking, [PolishAPI](https://polishapi.org/en/#:~:text=The PolishAPI standard is the,the internal market (PSD2).), NextGenPsd2, or StetPsd2 — then click Save.
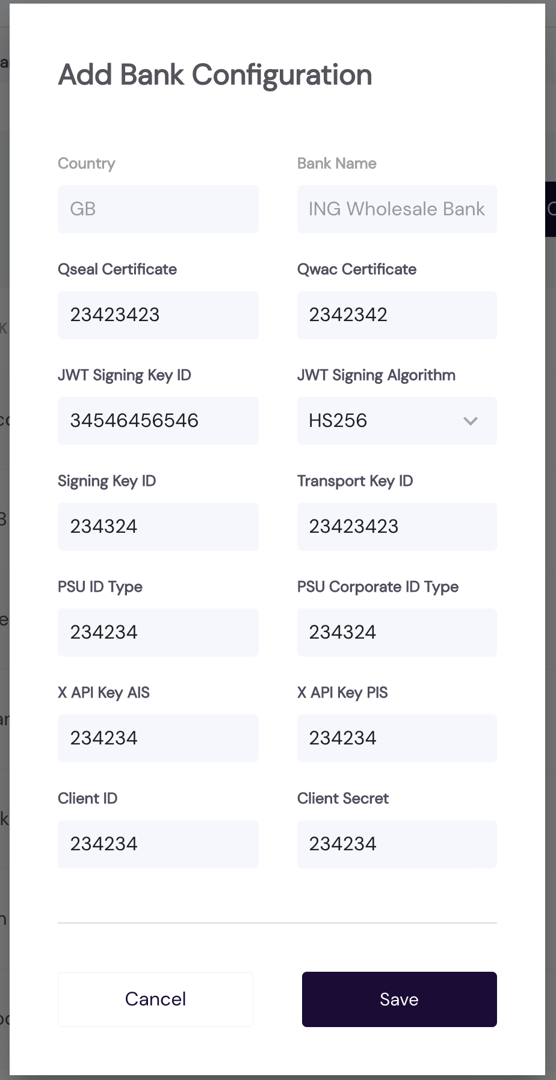
Find the desired bank for which the CONFIG AVAILABLE column indicates No by browsing the list or filtering the list by your search criteria (Country, Bank Name, etc.), then click the corresponding
and select Enable Bank.

Fill out the Add Bank Configuration form for the given standard with the appropriate identification and signing values and click Save.
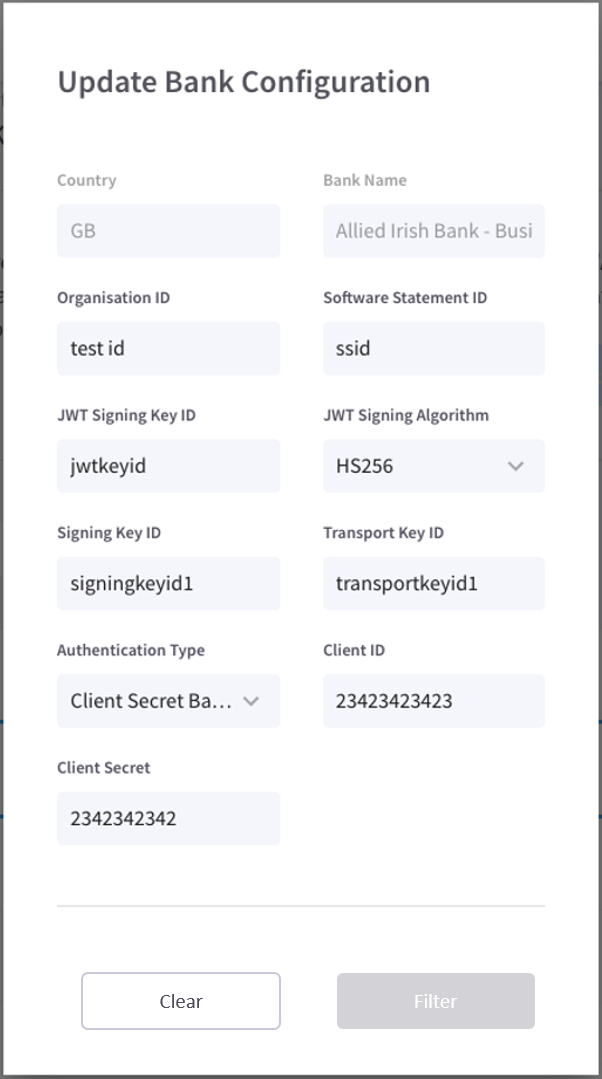
Select a bank in the list for which the CONFIG AVAILABLE column indicates Yes, then click its corresponding
and select Modify Bank Configuration.
Make the desired changes based on the applicable standard, then click Save.
You can filter the list of banks by optionally selecting the desired country from the Country drop-down list, a bank from the Bank Name drop-down, a Bank Registration Group from its drop-down, an Open Banking API Standard, and/or whether there is a Config Available. Click the Filter button to apply criteria or Clear to reset.
Click Default Settings to update the values associated with a particular banking Standard.

Be sure to Save your changes.
Before confirming its deletion, you should first export the configuration to a .csv file in order to recover it later, if necessary.
Select a bank in the list for which the CONFIG AVAILABLE column indicates Yes, click
and select Delete Bank Configuration.
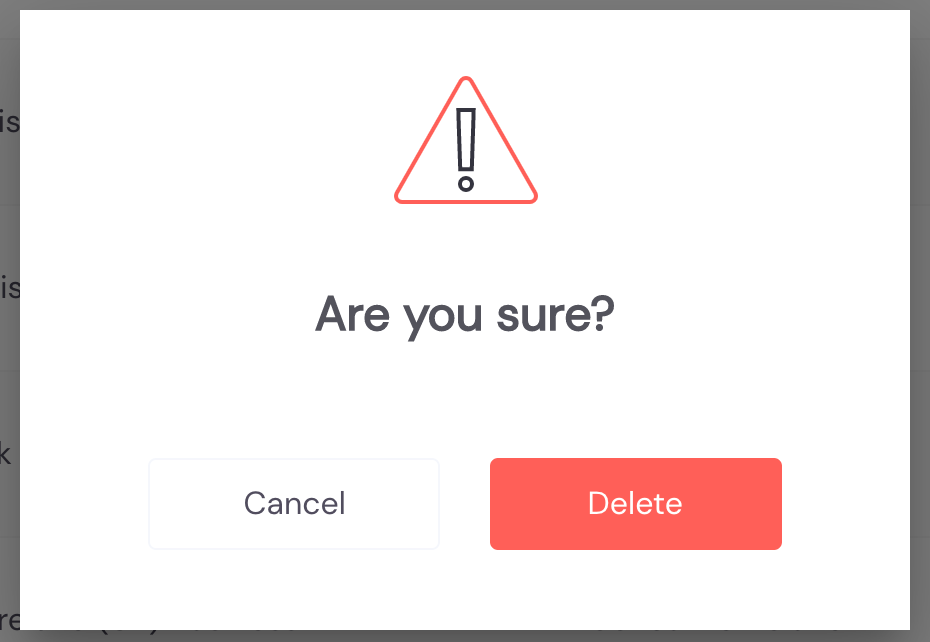
When prompted to confirm removal of the configuration, click Delete.
Confirming the deletion changes the bank's CONFIG AVAILABLE status to No. You can recover deleted configuration information by importing it from a template/saved .csv file.
- If you haven't already done so, select a Standard and any other filtering criteria you wish to apply.

Click Filter, then click Export.
Select a Save As destination, then click Save.
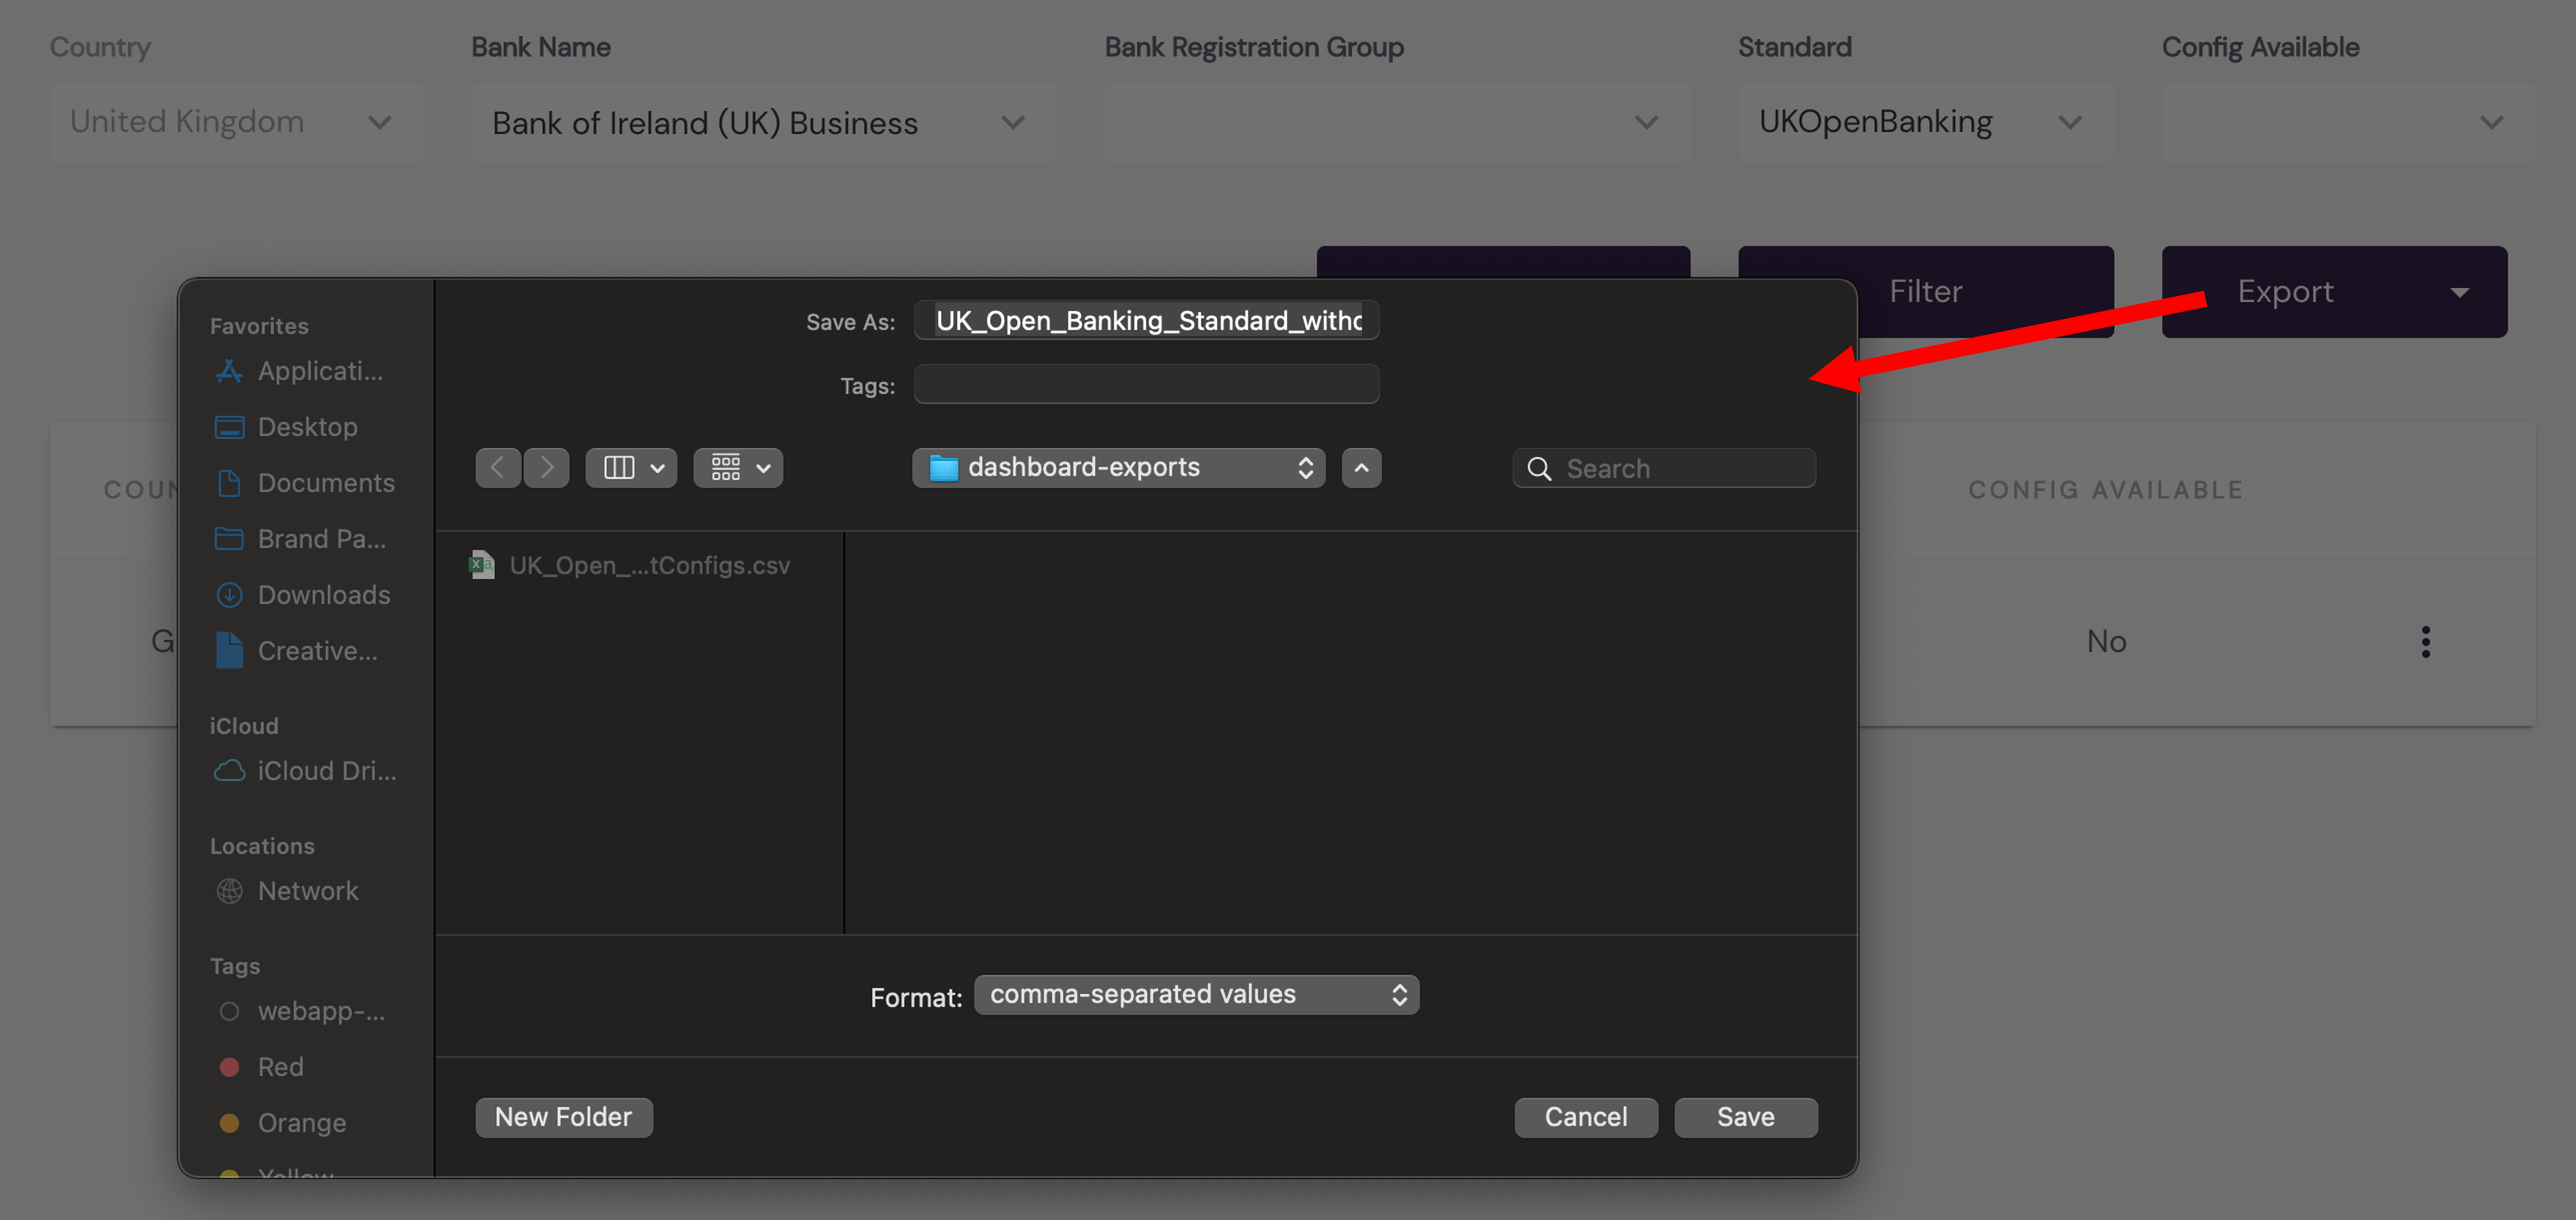
If CONFIG AVAILABLE for the filtered banks is Yes, the data for each filtered bank is exported with its saved configuration information to a .csv file. If CONFIG AVAILABLE is No, data is exported with default configuration settings.
- Click Import.
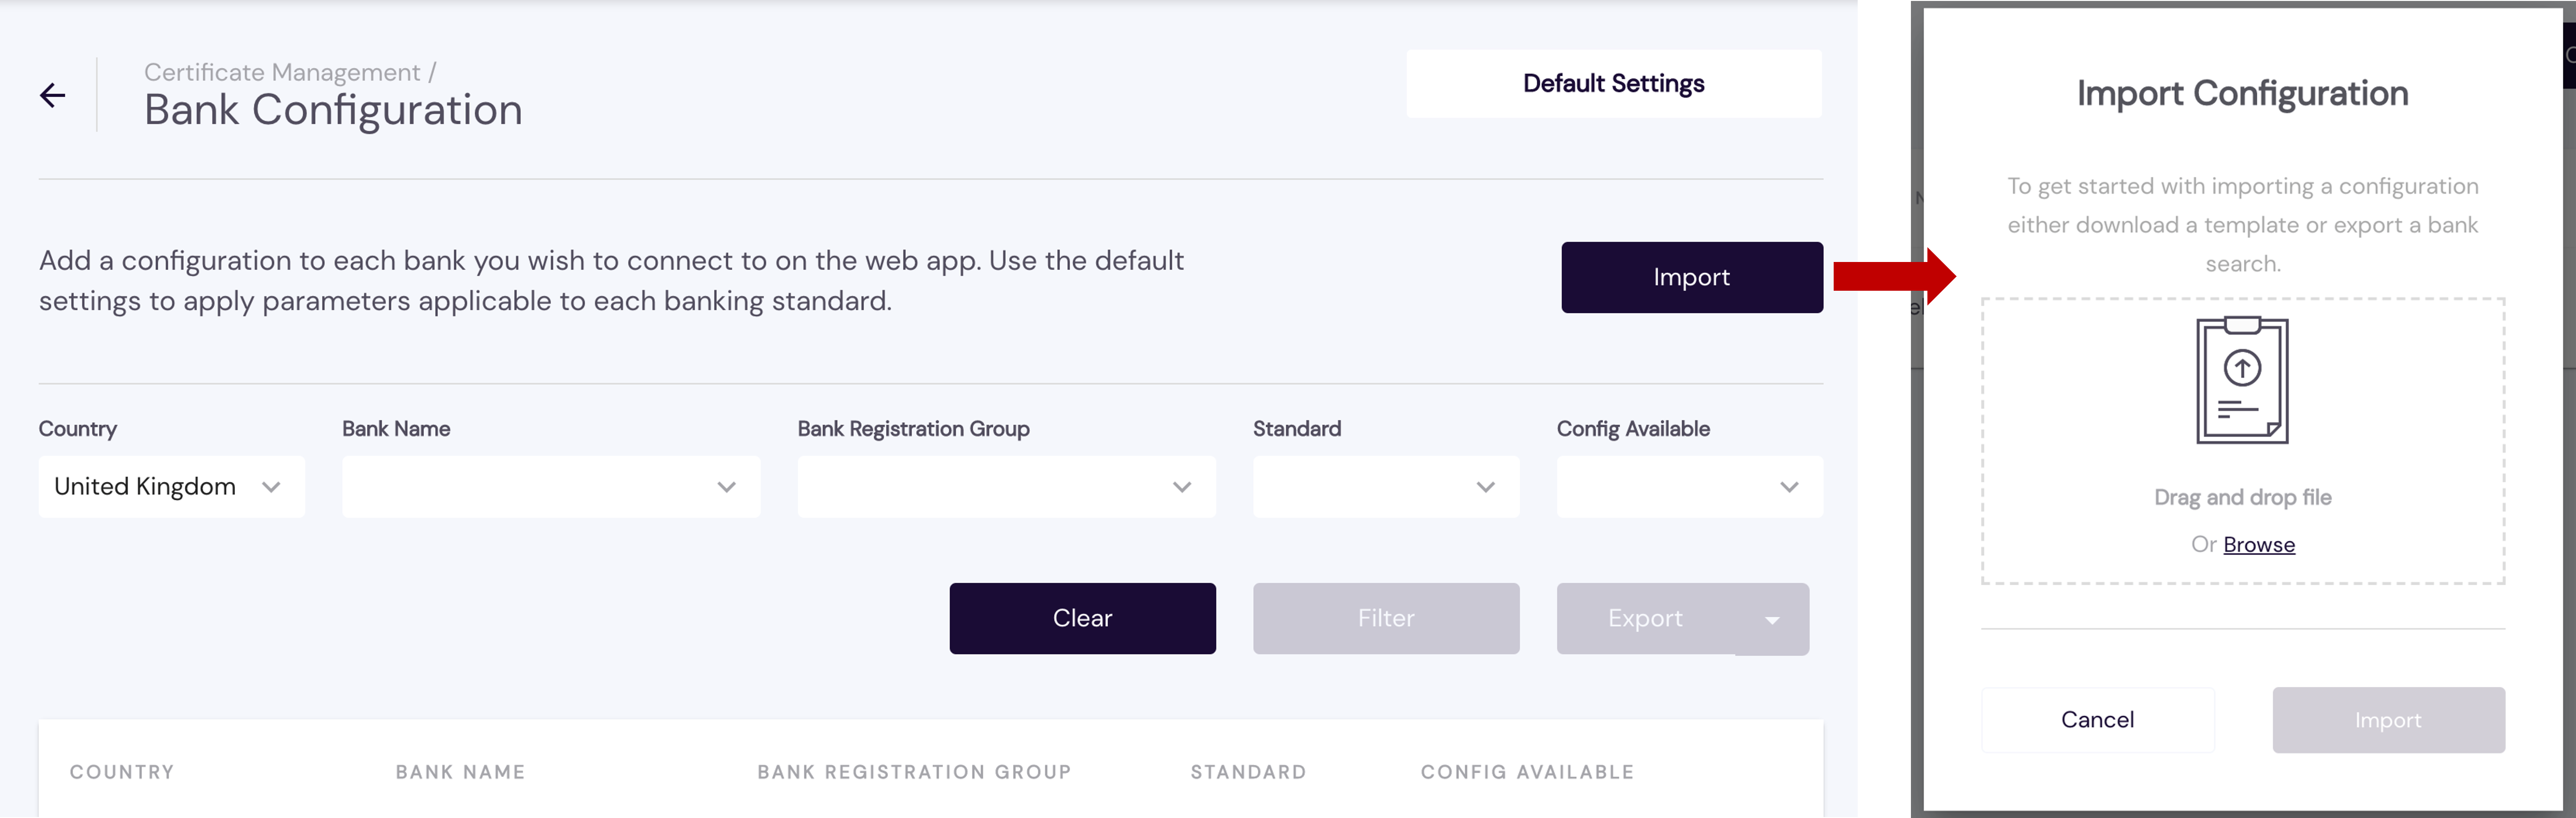
Drag and drop an exported .csv file to the screen area provided or click Browse to look for the file and select it.
Click Import.
Careful, an imported configuration will replace your existing configuration.
You can selectively modify a bank configuration by clicking

If you have any feedback about the developer documentation, please contact devdocs@token.io